Creating an App
This page explains how to create an app in the App Center.
Creating a RAG App
-
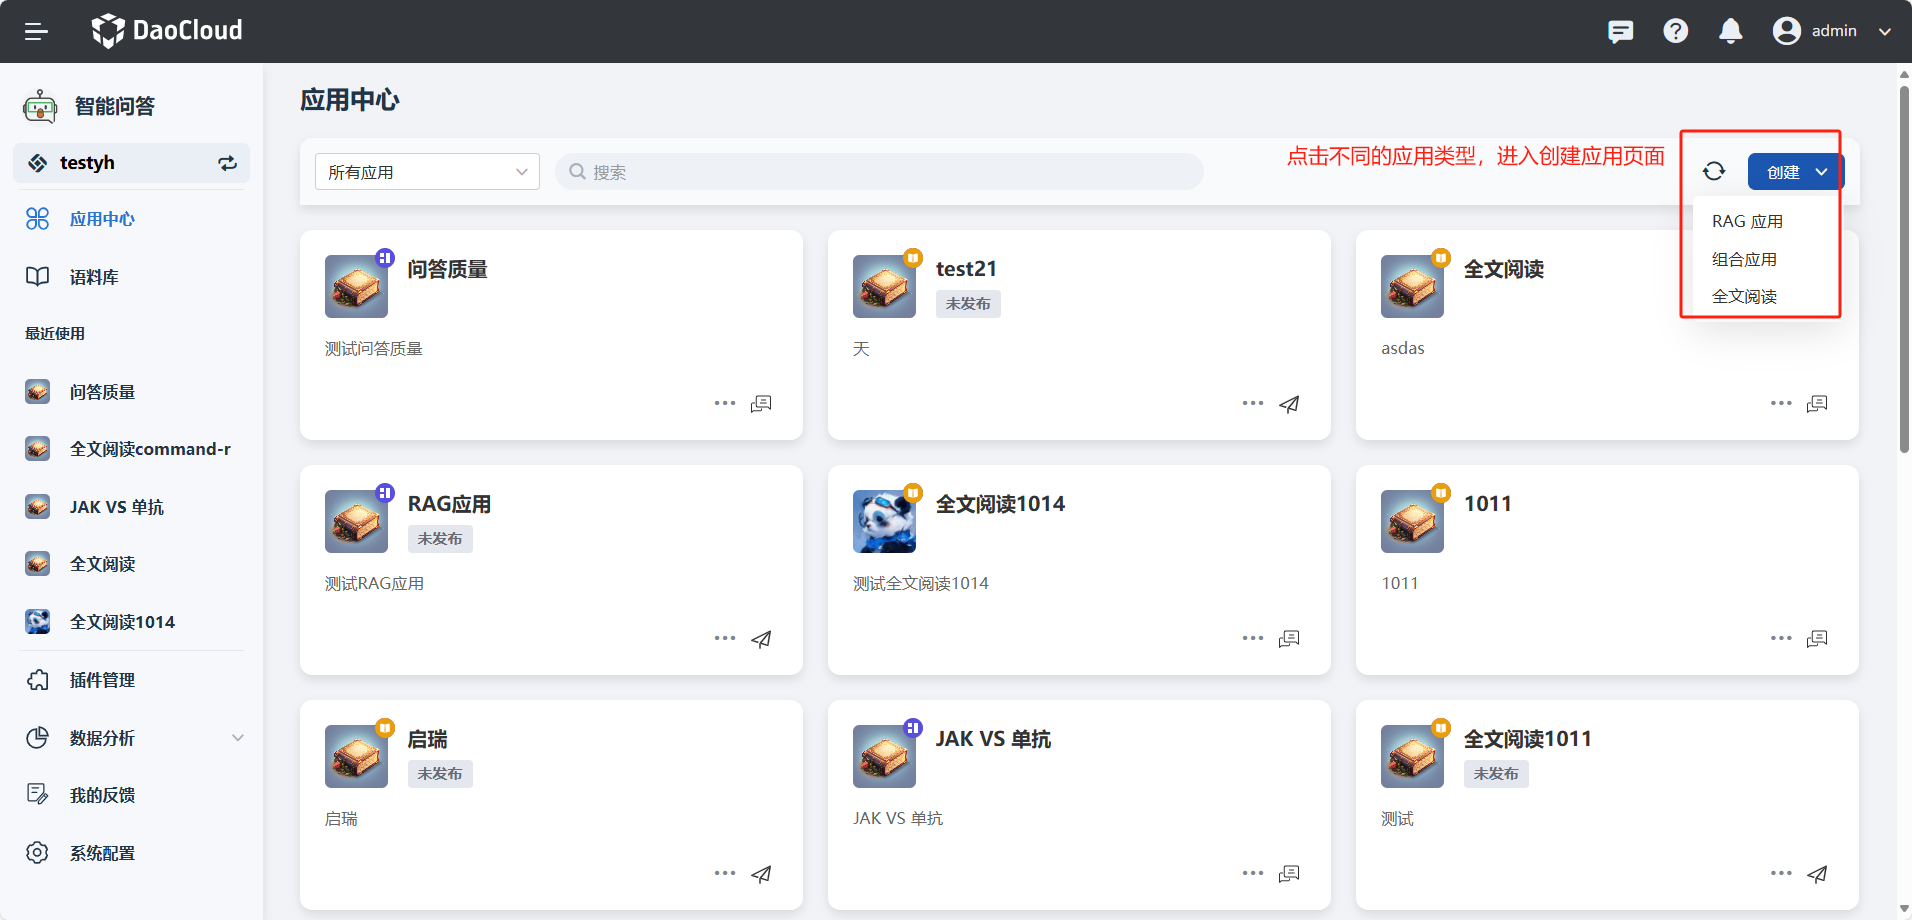
In the App Center page, click the Create button and select to create a RAG app.
-
Fill in the basic information for the app.
- Upload App Icon: Choose an image in jpg, jpeg, or png format, ensuring the file size does not exceed 10MB.
- Enter App Name: Limit to 20 characters.
- Fill in App Description: Briefly describe the app, not exceeding 100 characters.
- App Debugging: Choose to enable debugging, which will show the processing of the conversation in the chat window.
-
AI Configuration
- Select Large Language Model Service: Decide whether to use a local model service or an online model service (e.g., Azure Open AI or Wenxin Yiyan).
- Set Randomness: Adjust the creativity/divergence level of the model's responses.
- Repetition Penalty: Reduce the repetition of content in the generated text, with a default value of 1; the larger the value, the less likely it is to generate repeated content.
- Vectorization Model: Choose the vectorization model and vectorization model service for the app.
- System Prompt: Specify the role of the model, its capabilities, and some rules you want it to follow when conversing with you or assisting you in generating content.
- Template for Matching Corpus: Provide templates for the model to retrieve and answer questions.
- Template for Non-Matching Corpus: Provide general prompts for the model when similar content cannot be retrieved.
Note
-
Template for Matching Corpus: When similar content is retrieved, the corpus prompt template will be used. The template includes knowledge block {corpus_search_content} and user input {corpus_search_content}. These variables will be replaced with the corresponding text and sent to the large model for Q&A.
Create a knowledge Q&A game: 1. The response content must be within "{corpus_search_content}". 2. If the question cannot be found in the provided information, you will respond: "Sorry, the information in the database does not contain the result you need, please try modifying the referenced database or use the model's own capabilities to answer." {user_inputs_content} -
Template for Non-Matching Corpus: When similar content cannot be retrieved, an embedded prompt template will be used. The embedded prompt is concatenated before the user's question, serving as a general convention to guide the app model in generating responses.
-
Link Corpus
- Select Vectorization Model: Determine the model used for question vectorization.
- Select Corpus: Choose one or more existing corpora for model retrieval.
-
Set Retrieval Strategy
- Retrieval Preprocessing: Support custom plugins for Q&A preprocessing.
- Number of Knowledge Blocks Retrieved: Decide the number of knowledge blocks provided to the model.
- Similarity: Set the strictness of knowledge block matching.
- Reordering: Enable or disable the reordering model to improve result ranking.
- Only Corpus Responses: When enabled, the model will only respond according to the matched corpus content.
- Image and Text Mode: Control whether and how to output image and text content.
- Maximum Number of Image and Text Pieces: Determine how many images can be output in one chat.
- Image and Text Similarity: Set the strictness of image matching.
-
Set Memory Strategy
- Recent Chat Memory Rounds: Set the number of rounds or turns of chat history.
-
Save and Publish App
- Click the Save button; the app settings will be completed and saved as a draft.
Note
Please ensure that you fill out and configure all aspects of the app carefully according to the above steps to ensure that the app can accurately and efficiently respond to user needs.
- Click the Publish button; the app will be published to the App Center, where users can find and use your app.
Creating a Full Text Reading App
-
In the App Center page, click the Create button and select to create a Full Text Reading app.
-
Fill in the basic information for the app.
- Upload App Icon: Choose an image in jpg, jpeg, or png format, ensuring the file size does not exceed 10MB.
- Enter App Name: Limit to 20 characters.
- Fill in App Description: Briefly describe the app, not exceeding 100 characters.
-
AI Configuration
- Select Large Language Model Service: Decide whether to use a local model service or an online model service (e.g., Azure Open AI or Wenxin Yiyan).
- Set Randomness: Adjust the creativity/divergence level of the model's responses.
- Prompt: Provide templates for the model to retrieve and answer questions.
-
Save and Publish App
- Click the Save button; the app settings will be completed and saved as a draft.
Note
Please ensure that you fill out and configure all aspects of the app carefully according to the above steps to ensure that the app can accurately and efficiently respond to user needs.
- Click the Publish button; the app will be published to the App Center, where users can find and use your app.
Creating a Combination App
-
In the App Center page, click the Create button and select to create a Combination App.
-
Fill in the basic information for the app.
- Upload App Icon: Choose an image in jpg, jpeg, or png format, ensuring the file size does not exceed 10MB.
- Enter App Name: Limit to 20 characters.
- Fill in App Description: Briefly describe the app, not exceeding 100 characters.
- App Debugging: Choose to enable debugging, which will show the processing of the conversation in the chat window.
-
AI Configuration
- Select Large Language Model Service: Decide whether to use a local model service or an online model service (e.g., Azure Open AI or Wenxin Yiyan).
- App Prompt: Provide templates for the model to retrieve and answer questions.
Note
The prompts need to include different app IDs, which can be copied from the apps under app configuration.
-
App Configuration
- Select App: Choose an app from the App Center that can engage in chat normally.
- Copy ID: Used to fill in the prompts for selecting different apps during model chat.
-
Save and Publish App
- Click the Save button; the app settings will be completed and saved as a draft.
Note
Please ensure that you fill out and configure all aspects of the app carefully according to the above steps to ensure that the app can accurately and efficiently respond to user needs.
- Click the Publish button; the app will be published to the App Center, where users can find and use your app.